How to Make Perfect Cake Pops: Your Complete Guide to These Irresistible Treats
Cake pops have taken the dessert world by storm, transforming ordinary cake into adorable, bite-sized treats on sticks. Whether you're planning a birthday party, baby shower, wedding celebration, or simply want to impress your friends with Instagram-worthy desserts, learning how to make cake pops opens up endless creative possibilities. Best of all, you can create stunning vegan cake pops that are just as delicious and beautiful as traditional versions—no animal products required.
This comprehensive guide will walk you through everything you need to know about making perfect cake pops, from basic techniques to advanced decorating tips, all while using premium organic vegan chocolate for the most delicious results.
Quick Answer for Voice Search: Cake pops are made by crumbling baked cake, mixing it with frosting or binding agent, rolling into balls, inserting sticks, and coating with melted chocolate. For vegan cake pops, use plant-based cake, dairy-free frosting, and high-quality vegan chocolate like organic dark chocolate bars. Chill between each step for best results.
What Are Cake Pops and Why Are They So Popular?
The Sweet History Behind Cake Pops
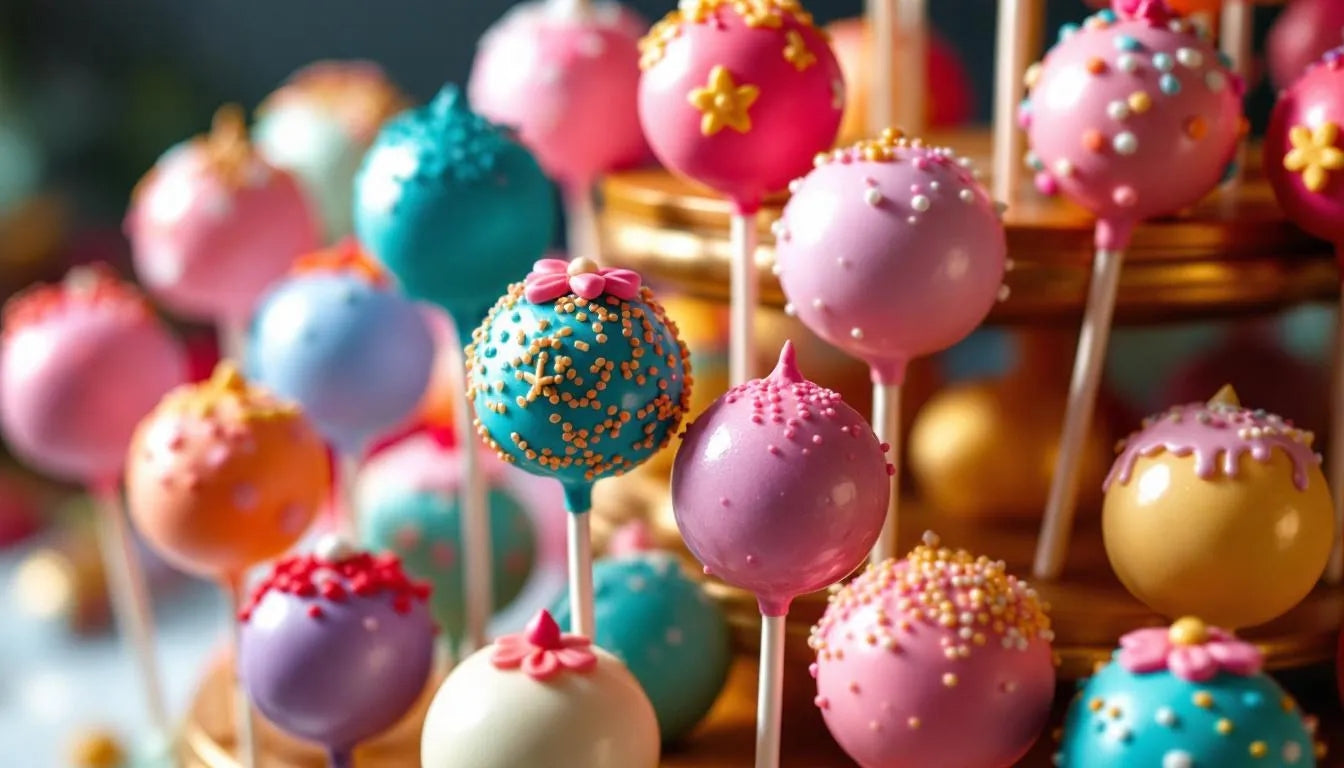
Cake pops became a baking sensation in the late 2000s, offering a playful twist on traditional cake presentation. These delightful treats combine the moistness of cake with the fun of a lollipop, creating perfectly portioned desserts that are easy to eat, share, and customize.
The beauty of cake pops lies in their versatility. You can make them for any occasion, season, or theme by simply changing the cake flavor, chocolate coating color, and decorative toppings. From elegant wedding cake pops to fun Halloween-themed treats, these bite-sized desserts adapt to any celebration.
Why Make Vegan Cake Pops?
Traditional cake pops contain dairy, eggs, and other animal products, but vegan versions are equally delicious while being more inclusive for guests with dietary restrictions. When you use premium organic vegan chocolate for coating, you're creating treats that are:
- Allergy-friendly: Free from dairy, eggs, and common allergens
- Environmentally conscious: Supporting sustainable, ethical ingredient sourcing
- Health-conscious: Made with whole food ingredients and natural sweeteners
- Delicious: Proving that plant-based desserts can rival any traditional version

Essential Ingredients for Vegan Cake Pops
The Base: Cake and Binding
The foundation of any great cake pop starts with moist, flavorful cake. You can use any vegan cake recipe or even a boxed vegan cake mix as your starting point. Popular flavors include:
- Chocolate cake: Rich and decadent, pairs perfectly with any chocolate coating
- Vanilla cake: Classic and versatile, works with any flavor combination
- Red velvet: Stunning color that looks beautiful when pops are broken open
- Lemon cake: Light and refreshing for spring and summer occasions
- Carrot cake: Unique flavor with added texture from nuts and coconut
For binding the crumbled cake, you'll need vegan frosting or alternatives like:
- Vegan cream cheese frosting
- Coconut butter or cashew butter
- Melted vegan chocolate
- Date paste for a refined sugar-free option
The Star: Premium Vegan Chocolate for Coating
The chocolate coating makes or breaks your cake pops. Using high-quality vegan chocolate ensures smooth melting, beautiful shine, and incredible taste. Our Sea Salt & Almond Vegan Chocolate 81% provides rich, complex flavor, while the Hazelnut Chocolate Bars add a nutty dimension to your cake pops.
For best results, you'll need approximately 12-16 oz of chocolate to coat 20-24 cake pops, depending on size and coating thickness.
Additional Supplies You'll Need
- Lollipop sticks or paper straws (6-inch work best)
- Styrofoam block for drying cake pops
- Double boiler or microwave-safe bowl for melting chocolate
- Parchment paper for easy cleanup
- Decorations: Sprinkles, crushed nuts, coconut flakes, edible flowers, or additional melted chocolate for drizzling
Step-by-Step Guide to Making Perfect Cake Pops
Step 1: Bake and Cool Your Cake
Start by baking your chosen vegan cake in a 9x13 inch pan according to the recipe instructions. The key to successful cake pops is using cake that's completely cooled—preferably baked the day before. This ensures the proper texture for crumbling and shaping.
Pro tip: Slightly underbaked cake (which appears moist in the center) often works better for cake pops than fully baked cake, as it provides more binding power.
Step 2: Crumble the Cake
Once your cake is completely cool, break it into large chunks and place in a large mixing bowl. Using your hands or a fork, crumble the cake into fine, uniform crumbs. Think of the texture you're after—it should resemble coarse sand with no large chunks remaining.
This step is therapeutic and fun! Don't rush it. Properly crumbled cake ensures smooth, evenly textured cake pops.
Step 3: Add Binding and Mix
Add your vegan frosting or binding agent gradually—start with 1/2 cup and add more as needed. You want the mixture to hold together when squeezed but not be overly wet or sticky. The perfect consistency should feel like playdough or cookie dough.
Mix thoroughly with your hands, squeezing and working the mixture until completely combined. If the mixture is too dry and crumbly, add more frosting one tablespoon at a time. If too wet, add more cake crumbs.
Step 4: Shape Into Balls
Using a small cookie scoop (1-2 tablespoons) for uniform sizing, portion out the cake mixture. Roll each portion between your palms to create smooth, round balls. Place shaped balls on a parchment-lined baking sheet.
For perfectly round cake pops, the secret is firm but gentle pressure while rolling. Too much pressure creates cracks; too little leaves them lumpy.
Refrigerate the shaped balls for at least 30 minutes or freeze for 15 minutes. This critical step ensures they hold together when dipped in chocolate.
Step 5: Melt Your Vegan Chocolate
While your cake balls chill, prepare your chocolate coating. Learning how to melt chocolate in the microwave or using a double boiler method will give you perfectly smooth results.
Chop your vegan chocolate bars into small, uniform pieces for even melting. Using the microwave method:
- Place chopped chocolate in a microwave-safe bowl
- Heat at 50% power for 30 seconds
- Stir thoroughly
- Continue heating in 15-second intervals, stirring between each
- Stop when a few small pieces remain and stir until completely smooth
The chocolate should be fluid but not hot—around 90-95°F is ideal for coating cake pops.

Step 6: Attach Sticks and Dip
This is where your cake pops come to life! For each chilled cake ball:
- Dip the tip of a lollipop stick about 1/2 inch into the melted chocolate
- Insert the chocolate-coated stick into the cake ball, pushing it about halfway through
- Return to the freezer for 5-10 minutes to set the chocolate "glue"
Once the sticks are secure, you're ready for the main coating:
- Hold the cake pop by the stick and dip it straight down into the melted chocolate
- Submerge completely, then lift out slowly
- Gently tap the stick against the edge of the bowl to remove excess chocolate
- Rotate the pop to ensure even coverage
- Before the chocolate sets, add any sprinkles or decorations
- Insert the stick into a styrofoam block and allow to dry completely
Pro tip: If you're using Sugar-Free Chocolate Bar Bundle for coating, the melting process may require slightly lower temperatures. Check out our guide on melting cocoa for detailed techniques.
Step 7: Decorate and Personalize
While the chocolate coating is still wet, you have a limited window to add decorations. Work quickly but carefully:
- Sprinkles: Classic and colorful, perfect for celebrations
- Crushed nuts: Add texture and sophistication
- Coconut flakes: Beautiful for tropical or winter themes
- Edible glitter: Extra sparkle for special occasions
- Drizzled chocolate: Use contrasting chocolate colors for elegant designs
For drizzling, place leftover melted chocolate in a piping bag or plastic bag with a tiny corner cut off. Create zigzag patterns, dots, or abstract designs over the set base coat.
Creative Cake Pop Variations and Flavor Combinations
Chocolate Lovers Collection
For true chocolate enthusiasts, create a collection of chocolate-on-chocolate cake pops:
- Double Dark Chocolate: Chocolate cake balls coated in Sea Salt & Almond Vegan Chocolate 81% with a sprinkle of flaky sea salt
- Hazelnut Heaven: Chocolate cake with hazelnut butter binding, coated in Hazelnut Chocolate Bars
- Salted Caramel Dream: Chocolate cake with caramel swirl, coated in Salted Caramel Chocolate Bars and topped with caramel drizzle
Seasonal and Themed Cake Pops
Match your cake pops to any occasion:
Spring: Lemon cake with vanilla coating, decorated with edible flowers Summer: Coconut cake with chocolate coating and toasted coconut Fall: Pumpkin spice cake with cinnamon-chocolate coating Winter: Peppermint cake with dark chocolate coating and crushed candy canes
For holidays, create themed designs using different colored coatings and decorations. Learn more creative ideas in our vegan fudge recipe article, which includes similar decorating techniques.
Nut-Free and Allergy-Friendly Options
Our vegan chocolate is naturally peanut-free and soy-free, making it perfect for allergy-conscious baking. Use sunflower seed butter instead of nut butters for binding, and decorate with seeds instead of nuts for completely allergen-friendly cake pops.

Troubleshooting Common Cake Pop Problems
Problem: Cake Pops Fall Off Sticks
Solution: This usually happens because the cake balls weren't chilled long enough before dipping, or the chocolate coating was too hot. Always freeze cake balls for at least 15 minutes before the first dip, and ensure your chocolate isn't steaming hot. Dipping the stick tip in chocolate before insertion creates a secure "glue."
Problem: Chocolate Coating Cracks
Solution: Cracks occur when there's too much temperature difference between the cold cake ball and the chocolate. Let cake balls sit at room temperature for 5 minutes before dipping. Also, avoid coating cake balls straight from the freezer—the refrigerator is cold enough.
Problem: Coating Is Too Thick or Clumpy
Solution: Your chocolate may be too cool or too thick. Reheat gently in short bursts, stirring well. For a thinner coating consistency, you can add 1-2 teaspoons of coconut oil to the melted chocolate. For more details, read our guide on can you melt chocolate chips to coat candy.
Problem: Decorations Won't Stick
Solution: Decorations must be added while the chocolate coating is still wet. Work in small batches—dip 3-4 pops, decorate them, then dip the next batch. If chocolate sets before you add decorations, use a tiny dab of melted chocolate as "glue."
Storing and Transporting Your Cake Pops
Short-Term Storage
Cake pops stay fresh at room temperature for 1-2 days if kept in a cool, dry place away from direct sunlight. For longer storage, refrigerate in an airtight container for up to 1 week. Bring to room temperature 30 minutes before serving for best taste and texture.
Learn more about chocolate preservation in our comprehensive guide on how long does chocolate last.
Long-Term Storage
You can freeze completely finished cake pops for up to 3 months! Wrap individually in plastic wrap, then place in a freezer-safe container or bag. Thaw in the refrigerator overnight, then bring to room temperature before unwrapping to prevent condensation. Read our detailed instructions on can you freeze chocolate for best practices.
Transporting Tips
Transporting cake pops requires care to prevent damage:
- Use a styrofoam block secured in a box or container
- Cover loosely with plastic wrap (don't let it touch the cake pops)
- Keep in a temperature-controlled environment
- Transport on a flat surface in your vehicle
- For warm weather, transport in a cooler with ice packs (but don't let them touch the pops)
Frequently Asked Questions About Cake Pops
Can I make cake pops without a cake pop maker?
Absolutely! You don't need any special equipment to make cake pops. The traditional method of crumbling baked cake and mixing with frosting actually produces better texture and flavor than most cake pop makers. All you need is a regular cake pan, mixing bowl, and lollipop sticks. Cake pop makers can be convenient for shaping, but hand-rolling gives you more control over size and consistency.
How far in advance can I make cake pops?
You can make cake pops up to 2-3 days in advance when stored properly at room temperature, or up to 1 week when refrigerated. The cake balls can be shaped and frozen for up to 2 months before dipping, which makes them perfect for planning ahead. For best appearance and taste, add decorations no more than 24 hours before serving, as some sprinkles may bleed color into the chocolate coating over time.
What's the best chocolate for coating cake pops?
The best chocolate for cake pops is high-quality chocolate with sufficient cocoa butter content, which ensures smooth melting and beautiful shine. Our organic vegan chocolate bars work perfectly because they contain premium cacao butter and melt smoothly. Dark chocolate with 70-81% cacao content provides the most authentic chocolate flavor and easiest working consistency. Avoid chocolate chips designed for baking, as they contain stabilizers that prevent smooth melting.
Why is my cake pop mixture too dry or too wet?
Getting the right cake-to-frosting ratio is crucial and varies based on your cake's moisture level. Start with less frosting than you think you need—you can always add more. The mixture should hold together when squeezed but not feel sticky or wet. Overmixing or adding too much frosting creates cake pops that are too heavy and may slide off sticks. If your mixture is too dry, add frosting one tablespoon at a time. If too wet, add more cake crumbs or refrigerate the mixture for 30 minutes to firm up.
Can I use store-bought cake for cake pops?
Yes! Using store-bought cake is a convenient shortcut that still produces delicious cake pops. Look for vegan cakes at health food stores, specialty bakeries, or some mainstream bakeries that offer vegan options. You can also use boxed vegan cake mix, which is often more affordable than buying premade cake. Just ensure whatever cake you use is completely cooled before crumbling, and adjust the amount of frosting based on the cake's moisture level.
Featured Snippet Summary
How do you make cake pops? Make cake pops by crumbling cooled cake, mixing with vegan frosting until the consistency of playdough, rolling into balls, chilling, inserting sticks, and coating in melted vegan chocolate. Use approximately 1 part frosting to 4 parts crumbled cake. Refrigerate between steps for best results.
Create Your Own Stunning Vegan Cake Pops Today
Now that you've mastered the art of making cake pops, it's time to bring your creative vision to life! Whether you're planning an elegant wedding display, a fun birthday party treat, or simply want to enjoy homemade desserts that align with your values, cake pops offer endless possibilities for delicious plant-based indulgence.
The secret to truly exceptional cake pops starts with premium ingredients. When you use our organic, fair-trade vegan chocolate, you're not just creating beautiful desserts—you're supporting sustainable farming practices, ethical sourcing, and your own health-conscious lifestyle.
Ready to start creating? Explore our complete collection of vegan chocolate bars perfect for melting and coating, including our bestselling Berkeley Bar Vegan Chocolates and CACOCO Bestseller Bundle. Every bar is crafted with 81% organic cacao, free from dairy, soy, gluten, and refined sugars—pure chocolate perfection for your homemade creations.
For even more inspiration, browse our vegan baking ingredients collection, where you'll find everything from organic cacao butter to pure cacao paste for advanced chocolate-making projects.
Don't forget to share your cake pop creations with us! We love seeing how our chocolate inspires your culinary creativity. Tag us in your photos and join our community of conscious chocolate lovers who believe that indulgence and ethics can coexist beautifully.
Shop our premium organic vegan chocolate collection today and transform ordinary celebrations into extraordinary moments—one delicious, plant-based cake pop at a time!

Claire Bennett
I'm Claire, a chocolate lover and artisan based in a small town where I run a tiny home kitchen dedicated to exploring everything chocolate. From single-origin dark bars to creamy ganache and handmade truffles, I find joy in working with all types of chocolate. I believe chocolate has a story, and I love bringing that story to life through humble, heartfelt creations.


Leave a comment
This site is protected by hCaptcha and the hCaptcha Privacy Policy and Terms of Service apply.