Can You Melt Chocolate Chips to Coat Candy? Perfect Methods and Expert Tips
The Short Answer: Yes, But With Some Considerations
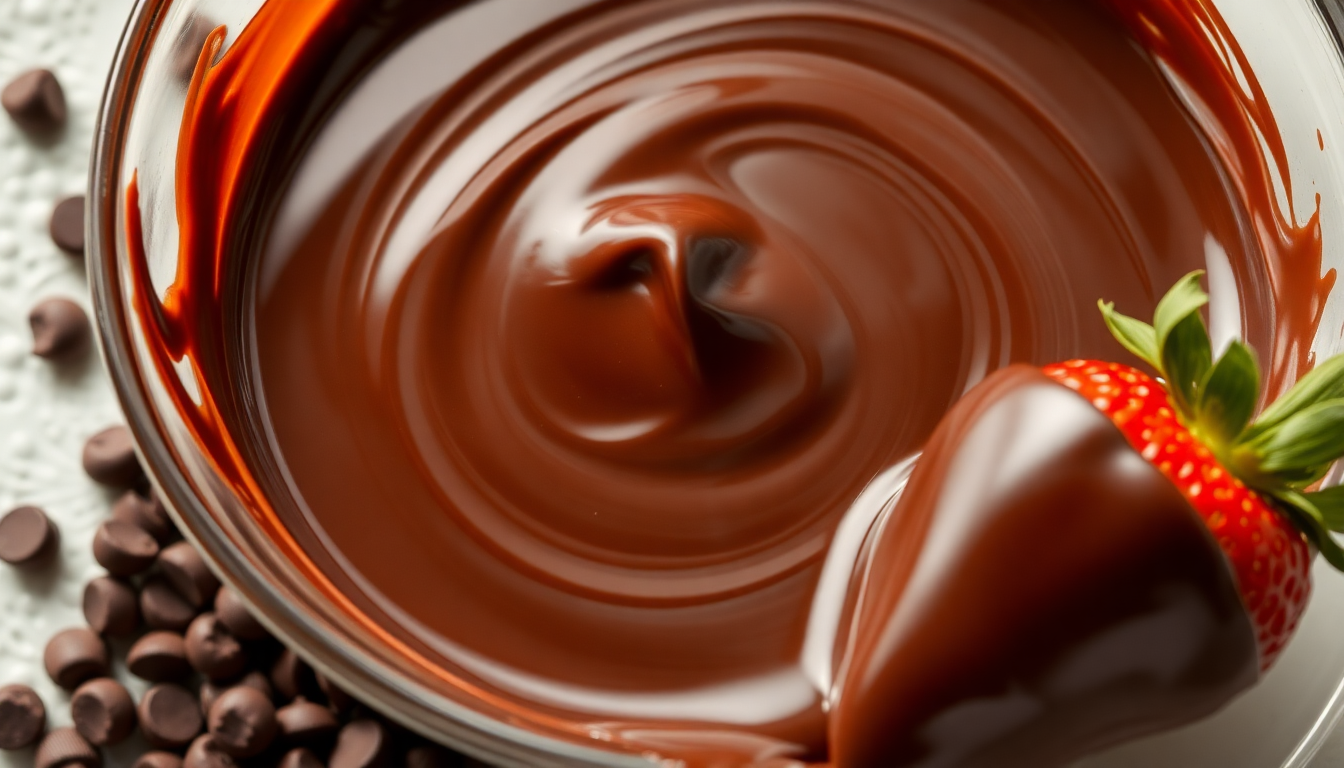
Yes, you absolutely can melt chocolate chips to coat candy! Chocolate chips are readily available, affordable, and come in various flavors (milk, dark, semi-sweet, white), making them a convenient option for candy coating. However, there are some important considerations to keep in mind for the best results.
Chocolate chips are designed to maintain their shape during baking, which means they contain less cocoa butter than couverture or other chocolates specifically designed for melting and coating. This composition difference affects how they melt and set, but with the right techniques, you can still achieve excellent results for your homemade chocolate-covered treats.
Understanding Chocolate Chips vs. Candy Melts
Before diving into melting methods, it's important to understand the differences between chocolate chips and candy melts (also called confectionery coating or almond bark), as this will help you decide which is best for your specific candy-making project.
Chocolate Chips
Pros:
- Better flavor profile with a true chocolate taste
- Widely available and often less expensive
- Melt in your mouth when eaten (due to cocoa butter content)
- Available in quality varieties (like Ghirardelli or Guittard)
Cons:
- Require the addition of shortening or oil for smooth dipping
- May not set as firmly at room temperature
- Can be trickier to work with (may seize if exposed to moisture)
- Limited color options (typically brown shades and white)
- May develop white streaks (bloom) if not properly tempered
Candy Melts
Pros:
- Specifically designed for easy melting and coating
- Set firmly at room temperature
- Available in numerous colors
- Less susceptible to seizing
- No tempering required
Cons:
- Less authentic chocolate flavor (often described as waxy or overly sweet)
- Contains vegetable oils instead of cocoa butter
- Sometimes more expensive than chocolate chips
- Artificial flavors and colors
How to Successfully Melt Chocolate Chips for Coating
For the best results when using chocolate chips as a candy coating, follow these methods and tips:
Method 1: Microwave Melting (Quickest Method)
-
Measure your chocolate chips - For a small batch of candy coating, start with 1 cup of chocolate chips and 1-2 teaspoons of vegetable shortening or coconut oil.
-
Combine in a microwave-safe bowl - Glass or ceramic works best for even heating.
-
Microwave at reduced power - Set your microwave to 50% power to avoid overheating.
-
Heat in short intervals - Start with 30 seconds, then stir thoroughly.
-
Continue with shorter intervals - Heat for 15-20 second bursts, stirring well after each interval.
-
Stop when almost melted - Remove from the microwave when a few small chips remain unmelted and stir until completely smooth. The residual heat will melt the remaining pieces.
Method 2: Double Boiler Method (Most Controlled)
-
Set up a double boiler - Fill a saucepan with 1-2 inches of water and place a heat-resistant bowl on top. The bowl should fit snugly but not touch the water.
-
Add chocolate and shortening - Place chocolate chips and 1-2 teaspoons of shortening or oil in the top bowl.
-
Heat gently - Bring water to a simmer (not a full boil) over medium-low heat.
-
Stir constantly - Use a rubber spatula to stir the mixture continuously until smooth.
-
Remove from heat - Once fully melted, remove the bowl from the heat source but keep it over the hot water to maintain temperature while dipping.
Key Tips for Success
-
Add shortening or oil - Adding 1-2 teaspoons of vegetable shortening, coconut oil, or paramount crystals per cup of chocolate chips helps create a smoother consistency for dipping.
-
Keep water away - Even a tiny drop of water can cause your chocolate to seize and become grainy. Keep all utensils and workspaces completely dry.
-
Avoid overheating - Chocolate scorches easily. Always err on the side of lower heat and more time.
-
Use room temperature centers - Very cold candy centers can cause the chocolate coating to crack as it sets. Allow refrigerated centers to come to room temperature for about 10 minutes before dipping.
-
Maintain proper temperature - If your melted chocolate begins to thicken while you're working, briefly return it to heat and stir until smooth again.
Troubleshooting Common Issues
Thick or Clumpy Chocolate
If your melted chocolate chips become too thick for smooth dipping:
- Add a small amount of additional shortening or oil (1/2 teaspoon at a time)
- Stir well and check consistency before adding more
- Gently reheat if necessary
Seized Chocolate
If your chocolate becomes grainy or stiff (seized):
- Add 1 teaspoon of vegetable oil for every 2 ounces of chocolate
- Stir vigorously and reheat gently
- If severely seized, you may need to use it for a different purpose (like baking)
Chocolate Setting Too Quickly
If your chocolate hardens before you finish dipping:
- Work in a warm room (not cold)
- Keep the bowl over warm (not hot) water while working
- Only melt as much chocolate as you can use in about 10-15 minutes
Streaky or Dull Appearance
If your finished candies have a dull or streaky appearance:
- This is called "bloom" and happens when chocolate isn't properly tempered
- It's purely cosmetic and doesn't affect taste
- For a glossier finish, try adding a small amount of grated cocoa butter or paramount crystals
When to Choose Chocolate Chips vs. Candy Melts
Choose Chocolate Chips When:
- Flavor is your priority
- You're making treats that will be refrigerated
- You're adding flavorings like peppermint or orange extract
- Your project doesn't require bright colors
- You're willing to add shortening and take extra care in the process
Choose Candy Melts When:
- You need vibrant colors
- Ease of use is a priority
- Your treats will be stored at room temperature
- You're working with children or beginners
- You need a quick set time
Creative Ideas for Chocolate-Dipped Treats
Now that you know how to successfully melt chocolate chips for coating, here are some delicious treat ideas to try:
- Chocolate-Covered Strawberries - A classic that's always impressive
- Dipped Pretzels - Sweet and salty perfection
- Cookie Dough Truffles - Eggless cookie dough formed into balls and dipped
- Peanut Butter Balls - Like homemade Reese's cups
- Marshmallow Pops - Skewered marshmallows dipped and decorated
- Oreo Truffles - Crushed Oreos mixed with cream cheese, formed and dipped
- Dipped Rice Krispie Treats - Cut into bars or shapes and partially dipped
- Chocolate-Covered Dried Fruit - Try apricots, cherries, or orange slices
- Coconut Balls - Also known as Raffaello truffles
- Chocolate-Dipped Biscotti - Perfect with coffee
Storage and Shelf Life
For the best quality and appearance of your chocolate-covered candies:
- Room Temperature Storage - Store in a cool, dry place in an airtight container for 1-2 weeks
- Refrigerator Storage - Can extend shelf life to 2-3 weeks, but may cause condensation when removed
- Freezer Storage - Most chocolate-covered candies can be frozen for up to 3 months
- Proper Packaging - Layer with waxed paper to prevent sticking
Final Thoughts
While specialized dipping chocolates and candy melts have their place in candy making, chocolate chips are a perfectly viable option for coating candies when handled properly. The addition of a small amount of shortening or oil helps achieve a smoother consistency, and careful melting techniques prevent common issues like scorching or seizing.
Whether you're making holiday treats, special gifts, or just satisfying a sweet tooth, understanding how to properly melt and work with chocolate chips opens up a world of delicious possibilities. The most important factors are patience, attention to detail, and a willingness to practice your technique. With these tips in hand, you'll be creating beautiful chocolate-coated confections in no time!

Claire Bennett
I'm Claire, a chocolate lover and artisan based in a small town where I run a tiny home kitchen dedicated to exploring everything chocolate. From single-origin dark bars to creamy ganache and handmade truffles, I find joy in working with all types of chocolate. I believe chocolate has a story, and I love bringing that story to life through humble, heartfelt creations.


Leave a comment
This site is protected by hCaptcha and the hCaptcha Privacy Policy and Terms of Service apply.